Showing posts with label cookies. Show all posts

Friday, January 02, 2009

Christmas Goodies


I am a bad person - I wholeheartedly admit it. I didn't meant to leave you all hanging, but the moving kicked in along with the aftermath of the other news, and, well, it was overwhelming. So let me jump straight to the biggest news.

I got married.

Boyo and I finally tied the knot and couldn't be happier. It was a small wedding, about as small as it gets in fact - a judge, two last-minute witnesses, and ourselves - but even the planning involved for that level was scary. From deciding to do the deed to doing it took a week, and I honestly cannot remember anything about that week leading up to the ceremony. I'm sure I worked (right up to 2 hours before the wedding - rar!) but I'm just going to have to hope I was productive because I don't remember a lick of what I did. My family is thrilled as they love him to pieces and I can completely relate.

The other news was that it was my birthday, but that's old news now and a bit blown out of the water by the wedding anyway. We timed it perfectly so we could have one celebration for both (I was born, and I got married - yay!). Of course, if he forgets our anniversary, he's doubly screwed ;)

So we got married, moved during one of the worst snowstorms this century in Seattle (yay snow!), fully unpacked, and cleaned everything. And just in time, as I now have a gorgeous kitchen and a serious itch to bake!

For this round: I'm a fan of chocolate and mint - I think I've mentioned this before, although it may have been drowned out in the "NOMnomnomnom"-ing. I got invited to a Christmas cookie party which was sadly cancelled due to the snow and the ice and the hills and the 20+ mph winds and the fact that no-one in the state of Washington knows how to drive in poor weather (me neither!)... but after I'd made the cookies. I should be complaining - these are by far the tastiest cookies I've ever had (evar!!) and having them around for Christmas break has, er, not helped my waistline. But, what can I say except NOMnomnomnomnom.

Peppermint Candy Cane Cookies (adapted from Epicurious.com)
Cookies
* 1 3/4 cups all purpose flour
* 1/2 cup unsweetened cocoa powder (preferably Dutch-process)
* 1/4 teaspoon salt
* 1 cup sugar
* 3/4 cup (1 1/2 sticks) unsalted butter, room temperature
* 1 large egg

Frosting
* 1 cup plus 2 tablespoons powdered sugar
* 3/4 cup (1 1/2 sticks) unsalted butter, room temperature
* 3/4 teaspoon peppermint extract
* 2 drops (or more) red food coloring/gel

Preparation

For cookies:
Whisk flour, cocoa, and salt in medium bowl to blend. Using electric mixer, beat sugar and butter in large bowl until well blended. Beat in egg. Add dry ingredients; beat until blended. Wrap dough in plastic wrap and flatten into a disk. Refrigerate 1 hour.

Preheat oven to 350°F. On a floured surface, roll out the dough to about 1/4-1/8" thickness. Use your cookie cutter to cut out the shapes you want, transfer to a cookie sheet, and refrigerate another 10 minutes. Bake for 8-10 minutes (do not overcook or they will be crispy). If making sandwich cookies, make sure to bake half the cookies backwards! Cool on sheet 5 minutes. Transfer chocolate cookies to racks and cool completely.

For frosting:
Using electric mixer, beat powdered sugar and butter in medium bowl until well blended. Streak the opposite sides of your piping bag with the food coloring/gel and add the frosting (you may want to only use 1/2 the frosting so the color shows up for all cookies. Make sure the coloring goes all the way to the piping tip, otherwise your first few cookies won't have any coloring.).

Pipe the frosting short-ways back and forth on one cookie. Place backwards cookie on top and press down gently. These are best cold. Makes 18-20 cookies (depending on size)

Wednesday, November 05, 2008

Maple-Bacon Chocolate Chip Cookies (and a tall glass of good news)

Gentle readers, it has been over a month since I last posted, and I do apologize. My excuses are good ones though, as I think you will agree. They number three (to be presented in three posts):

First: my boyo and I are moving! We got tired of the loud music and people throwing eggs at our door (no, this wasn't a Halloween thing, sadly), so we went looking. Folks, this is the market for renters - we found a beautiful condo with a waterfront view, for several hundred dollars less a month than we're paying now. The best part is the kitchen - I'll post pictures once we've fully moved in.

To celebrate our move to a better place (and one significantly closer to work, thankfully!) I give you Maple-Bacon Chocolate Chip Cookies. Yes, I finally jumped on the bacon-bandwagon and I cry to think of how long I resisted. I should have instead reasoned: "Bacon = good. Chocolate = good. Maple syrup on anything = good. Maple-Bacon Chocolate Chip Cookies must logically then = AWESOME!"

The recipe is from Never Bashful with Butter, who is one of the funniest individuals I have yet to meet - seriously folks, I'm not going to bother reiterating the recipe here, because you'll enjoy her version that much more.

Stick around; news items 2 and 3 are coming up, and they're doozies!

Tuesday, June 03, 2008

Food for Father

Hold onto your hats: this post is going to be a doozy. Father's Day is still a couple weeks away but this year it falls in a busy month for me, and unfortunately my Dad doesn't live down the street for me to just give him a hug (much as I'd like to). So this year I was forced to plan ahead. I sound like a good daughter -- in reality, I'm a bad sister. You see, I had another reason for sending out my gift early; my brothers' birthdays came and went, and I completely forgot to remark on them. Oops.

So, in repentance, I overkilled. It was great fun though and I felt properly forgiven when they called to thank me and I could barely understand through the mouths-full. Nothing makes you feel more loved than a strong demand that you move closer :D

As I said, I overkilled. As such, I'm going to break the contents of the gift into two posts - these treats are to be savored. So! My first offering: Raspberry Macarons with White Chocolate Ganache and Raspberry Jam. MmmmMmmm. I've been on a macaron kick (like you hadn't noticed!) and as my parents had dutifully ooh-ed and aw-ed my pictures I figured it was fair they got a taste.

There's a little story to how these macarons came about though. I'd been eyeing the dried raspberry powder from L'Epicerie but didn't want to shell out the cash to try some. I resolved to make my own and see if it passed muster first. Drying raspberries isn't hard - they go straight from freezer to oven and sit there for a few hours at a reasonably low temperature (190 F) until all moisture is evaporated. The purpose is to completely dehydrate the raspberries, leaving only the concentrated pulp left for grinding. There are a few stipulations though: 1) The raspberries should be deep-frozen before baking, and 2) you shouldn't live somewhere with 100% humidity (yes, this again.)

Eighteen hours later (I started at 10am, gave up at 10pm and continued again for half of the next day) I finally had dried raspberry shells. Grinding them up in a coffee grinder produced a coarse-to-fine dark maroon powder that tasted strongly of raspberries. Good! This seemed usable. I set it aside for the designated weekend...

....and the day after completing the powder, received a package in the mail. Inside were two packages of dried raspberry powder from L'Epicerie, a gift from my boyo's work. Wonderful people, they are! Now, even if you live in 100% humid climate, the homemade powder will do in a pinch. But oh, the superiority of the bought. This stuff turned the air around it raspberry-y. It was fine as dust and light as a feather, and had none of the grittiness of the homemade to it. Better yet, a tiny amount imparted plenty of raspberry flavor, so there was no need to over-use.

Behold the comparison:

I admit, I used the bought. How could I not? I ended up making two batches though, as through my first batch I learned of the potency of the powder. Too much used and the raspberry became almost aggressive, while the texture turned jammy. I scaled back the amount for the second batch and was left with beautiful macarons that balanced white chocolate and raspberry perfectly. The first batch I ate myself ;)

Raspberry Macarons with White Chocolate Ganache and Raspberry Jam (adapted from LA Times)
* 1 c + 3 tbsp almond flour
* 2 c + 3 tbsp powdered sugar
* 4 egg whites
* 3/4 tsp cream of tartar
* 4 scant tbsp sugar
* 1 scant tbsp dried raspberry powder
* 1 White Chocolate Ganache recipe
* raspberry jam (I used my leftovers from here)

Line two 17-by-12-inch baking sheets with parchment paper and set aside (you may want to fold over the edges to keep the paper flat).

In a food processor, blend the almond flour, powdered sugar and raspberry powder for 1 minute. Sift the blended almond mixture directly into a medium mixing bowl. Set aside. (This can be made up to 2 days in advance.)

Fill a small saucepan halfway with water. Bring to a simmer, then remove from the heat. In the bowl of a stand mixer, whisk the egg whites until foamy. Place the bowl over the pot of hot water and whisk quickly until the egg whites reach 100 degrees on a candy thermometer.

Remove the bowl from the pot of water and whisk in the cream of tartar. Place it on a stand mixer fitted with the whip attachment. Whip on medium speed for 2 minutes, then gradually beat in the sugar. Continue whipping for 6 minutes until the egg whites come to medium stiff peaks (tips droop only very slightly) and are shiny.

Remove the bowl from the mixer. Add egg whites to the almond mixture by gently bringing the flat side of a rubber spatula through the center of the egg whites and up the opposite side of the bowl, folding the dry ingredients over the egg whites. Repeat the same motion 50 times, turning the bowl a quarter turn each time.

Fit a pastry bag with a medium round tip (No. 4) and fill with the mixture. On the parchment-lined baking sheets, pipe 1.5-inch rounds (the batter will be slightly wet) by holding the bag at a slight angle and releasing small amounts of batter. Allow one-half inch between cookies; they will spread slightly.

Keep the piped cookies at room temperature, uncovered, for 1 to 2 hours. (This will help form a skin.) If in a high humidity area, place cookies in oven turned off but with oven light on. Remove cookies from oven and heat to 325 degrees, placing the racks in the center and lower shelves of the oven.

Bake the macarons for 12 minutes, reverse the trays on the racks and rotate. Bake 8 to 10 minutes more, or until firm and not wet. Cool on a rack.

White Chocolate Ganache (from JoyofBaking.com)
* 8 oz white chocolate, cut into small pieces
* 3/4 c heavy whipping cream
* 2 tbsp unsalted butter

Place the chopped chocolate in a medium sized stainless steel bowl. Set aside. Heat the cream and butter in a medium sized saucepan over medium heat. Bring just to a boil. Immediately pour the boiling cream over the chocolate and allow to stand for 5 minutes. Stir with a whisk until smooth.

Assembly:
Pair up cooled macaron shells to approximate size match. On one half spread a thin glaze of raspberry jam. Pipe ganache onto other half and gently sandwich together.

I had a lot of fun packaging them up:

But now the real question is, now that you know what's in the pink box... what's in the orange? Tune in next time.... (dundunDUN!)

Wednesday, May 21, 2008

Tiramisu Macarons

I am a very happy baker. No, strike that, I'm ecstatic. Pardon me a moment while I toot my own horn: just look at those macarons! Smooth tops, not a crack in sight, and although not visible, deliciously chewy inside. And best yet, this is representative of the whole batch; there wasn't a cracked top among them. I could weep for joy.

"What happened, what changed??" I hear you ask. Well, what happened was I tried a new recipe style as well as a few tricks I'd read about since my last struggle. The difference was astounding, so much so I feared to breathe in case I should break whatever lucky streak I was on. One hundred macarons in (I bake for a hungry crowd) and I finally started to believe that it wasn't luck at all. Remember how I said once I'd found my perfect brownie recipe I saved it in a million places so I'd never lose it? This recipe is now joining the brownie recipe.

The idea (and renewed interest) for a tiramisu variant of macarons came from Losillewen, who made her own beautiful morsels but has been derelict in posting them (graduating and job hunting are no excuse!). Genius, Los, simply genius.

In lieu of ladyfingers, the macaron shells give form to the treat while imparting a mild almond crunch and delicate coffee flavor. The mascarpone filling is lightly spiked with rum and just barely sweetened. The decadent blend of flavors is topped off with a hint of dark chocolate, completing the list of tastes you look for in a dessert you shouldn't have. This is a more subtle dessert with few heavy ingredients, making it easy to enjoy more than one.

Tiramisu Macarons (recipe adapted from L. A. Times)
* 1 c + 3 tbsp almond flour
* 2 c + 3 tbsp powdered sugar
* 4 egg whites
* 3/4 tsp cream of tartar
* 4 scant tbsp sugar
* 1/4 c instant coffee (more if you prefer a stronger flavor)
* Mascarpone Filling (recipe below)
* 6 oz dark chocolate, shaved

Line two 17-by-12-inch baking sheets with parchment paper and set aside (you may want to fold over the edges to keep the paper flat). In a food processor or coffee grinder, grind instant coffee granules into powder.

In a food processor, blend the almond flour, powdered sugar and coffee for 1 minute. Sift the blended almond mixture directly into a medium mixing bowl. Set aside. (This can be made up to 2 days in advance.)

Fill a small saucepan halfway with water. Bring to a simmer, then remove from the heat. In the bowl of a stand mixer, whisk the egg whites until foamy. Place the bowl over the pot of hot water and whisk quickly until the egg whites reach 100 degrees on a candy thermometer.

Remove the bowl from the pot of water and whisk in the cream of tartar. Place it on a stand mixer fitted with the whip attachment. Whip on medium speed for 2 minutes, then gradually beat in the sugar. Continue whipping for 6 minutes until the egg whites come to medium stiff peaks (tips droop only very slightly) and are shiny.

Remove the bowl from the mixer. Add egg whites to the almond mixture by gently bringing the flat side of a rubber spatula through the center of the egg whites and up the opposite side of the bowl, folding the dry ingredients over the egg whites. Repeat the same motion 50 times, turning the bowl a quarter turn each time.

Fit a pastry bag with a medium round tip (No. 4) and fill with the mixture. On the parchment-lined baking sheets, pipe 1.5-inch rounds (the batter will be slightly wet) by holding the bag at a slight angle and releasing small amounts of batter. Allow one-half inch between cookies; they will spread slightly.

Keep the piped cookies at room temperature, uncovered, for 1 to 2 hours. (This will help form a skin.) If in a high humidity area, place cookies in oven turned off but with oven light on. Remove cookies from oven and heat to 325 degrees, placing the racks in the center and lower shelves of the oven.

Bake the macarons for 12 minutes, reverse the trays on the racks and rotate. Bake 8 to 10 minutes more, or until firm and not wet. Cool on a rack.

Mascarpone Filling:
* 6 oz mascarpone cheese, softened
* 6 tbsp butter, softened
* 1/2-1 c powdered sugar (as necessary)
* 1/8-1/4 c rum

In a stand mixer, beat the mascarpone cheese until smooth, 1 minute. Add butter and rum and mix until incorporated. Slowly add powdered sugar to mixer, until filling is thick without being stiff. (The mascarpone should outweigh the sugar flavor.)

Update: one reader suggests less rum for a thicker filling - I've modified the recipe slightly to reflect their experience. Go slow and add in parts - you may not need all!

Assembly:
Match up fully-cooled macarons for size and shape. Pipe filling on bottom macaron and sprinkle with shaved chocolate. Place top macaron on chocolate and press lightly.

Sunday, April 06, 2008

Praline Macarons with Dulce de Leche (now with full Technicolor documentation!)

Macarons are fickle, flighty culinary concoctions. On the one hand, they're wonderfully delicious -- the shells are crisp on the outside, chewy on the inside and melded together with a thick, rich sauce or ganache. Each bite melts on the tongue, leaving a sweet, nutty taste and a craving for more.

On the other hand, they're a pain in the butt to make.

They weren't always so difficult. While in California I had engineered a few different types, and had had an easy enough time that I didn't understand the pain many protested undergoing. Then I moved from moderate California to rain-everyday Washington and discovered just how touchy macarons can be. They don't like cold, they don't like heat, and they don't like humidity. 68 degrees with <20% humidity was perfect. Washington, with 55 degrees and 100% humidity, was a whole 'nuther ballgame.

You're supposed to leave the macarons out after piping and before baking for an hour or two to allow a skin to form. Macarons are essentially a meringue, so to maintain the smooth top of an ideal macaron you must have a hard skin in place when the baking bubbles start. The bubbles then have nowhere to go but out the sides, creating the desired "foot" effect. The purpose of leaving the macarons out for the few hours before baking is to dry them out enough to create the necessary skin.

Did I mention the 100% humidity?

Four hours out and the macarons were still sticky to the touch. I should have just left them overnight (couldn't have hurt) but I like to wrap up my baking projects in one day, preferably. The end result therefore was mixed: some were cracked on top but peeled away from the paper easily, others had perfectly smooth tops but disintegrated when moved, and still more turned out unblemished and photographable.

"Get on with it!" I hear you cry. Ok, well: the recipe is adapted from Tartlette's version, modified to work for more humid areas. I don't believe it'll fail given drier climates, but that's what small batches and lots of practice is for! By the third batch I'd gotten the hang of it, and had photographic evidence to document the step-by-step process, just because I love you guys. By the way, here are a few other sites I referred to for symptomatic fixes.

Some basic notes: I left my egg whites out for ~24 hours before using, but I have no idea if it made a difference. Also, before processing my almond flour, I lightly toasted it on a cookie sheet at 325 degrees for ~3 minutes. The idea was to eliminate as much extra moisture from the almond flour as possible before use.

UPDATE: While writing up this post I was commenting to my boyo about how much the humidity here had affected the general skin-forming time. A few hours later he came back to the topic with "Could you have used a hairdryer?" ..... That's not a bad idea. You'd have to use a low setting, and hold the dryer way above the macarons so the air wouldn't force the batter around, but it might work in a pinch. The other solution that occurred to me after (of course!) was to turn the oven on "warm," and leave the macarons in for a bit with the door propped open. This would have to be watched carefully though, so try it first on just one batch!

The Dulce de Leche is from David Lebovitz's site: it's awesome and I could eat it by itself (and did!)

Crushed Praline:
* 1/3 cup sugar
* 1 cup unblanched almonds

Combine the sugar and almonds in a heavy saucepan. Place over medium heat to begin melting the sugar, and stir occasionally with a wooden spoon so the sugar melts and caramelizes evenly. Cook to a light amber color.

Scrape the praline from the saucepan and spread it about 1/4-inch thick on an oiled baking sheet or a marble surface. Let cool at room temperature for about 10 minutes. Break the hard praline into 1-1/2 inch pieces and place them in a bowl of a food processor and quickly pulse until finely ground to crumb consistency (any coarser and they'll break the macaron's skin).


Macarons:
* 3 egg whites
* 50 gr. granulated sugar
* 200 gr. powdered sugar
* 110 gr. ground almonds

In a stand mixer fitted with the whisk attachment, whip the egg whites to a foam, gradually add the sugar until you obtain a glossy meringue. Do not over-beat your meringue or it will be too dry and your macarons won't work. Soft peaks were about right for me.


Pulse the almond flour in a food processor a couple times, then gradually add the powdered sugar until thoroughly combined. You don't want to turn the almonds into butter, but by adding the powdered sugar in parts you'll insure the almonds are finely ground and fully incorporated. The picture below shows a before-and-after.


Add the almond mixture to the meringue in two parts, folding the mass carefully until you obtain a batter that flows like magma or a thick ribbon. Make sure there are no lumps or streaks! Test a small amount on a plate: if the tops flattens on its own you are good to go. If there is a small peak, give the batter a couple of turns.


Fill a pastry bag fitted with a plain tip with the batter and pipe small round onto parchment paper baking sheets. Sprinkle the praline powder over the shells. Let macarons sit out for a couple hours (or if need be, overnight!) until they are no longer sticky to the touch.


Preheat the oven to 315F. Bake for 8-10 minutes, depending on their size (mine were just under 2 inches wide, so I baked for 15-17 minutes). Let cool completely. If bottoms are still sticky after cooling, move the parchment paper to a cooling rack and leave for a couple of hours (or again, overnight. I love humidity!). Sandwich them with the Dulce de Leche, collapse into a chair, and enjoy!

Monday, March 10, 2008

Just your normal sugar cookie

Bear with me here: this was my first attempt at making sugar cookies. I know, I know, it's the staple of the cookie-diet but for my entire childhood I left that to my middle brother. For some inexplicable reason, there were a couple things I was much more comfortable having my brother make for me. Sugar cookies was one of them. Bacon was the other.

Ok, I was just lazy. But dang he made good sugar cookies/bacon! Anyhow, I figured it was time to try my hand at them. I had lemons I wanted to use though, so these are special sugar cookies. Lemon zested and glazed, you've got a chewy cookie with a tangy bite that fades into comforting sugar. Mmmmm.

But see, I shouldn't be allowed to blog. This talk of sugar cookies and bacon has me pondering a combo. I'm not crazy: it's a fad! Or if I'm crazy I'm in good company.

Ingredients:
* 1 cup unsalted butter
* 1 2/3 cup granulated sugar
* 2 large eggs
* 1 tbsp. vanilla extract
* 3 1/2 cup all-purpose flour
* 3/4 tsp. salt
* 2 1/2 tsp. baking powder
* Zest of 2 lemons
* 1-2 cup powdered sugar
* Lemon juice (sorry I can't be more precise)

Directions:

Preheat oven to 350 degrees.

Cream together the butter and sugar until smooth. Beat in the eggs, vanilla and lemon zest. Mix together the flour, salt and baking powder. Fold the flour into the butter mixture.

Roll dough into a log and wrap in wax paper; refrigerate at least 1 hour. Slice into 1/4 inch slices and arrange on an ungreased cookie sheet (they will not expand much.) Bake 10-12 minutes, until very lightly golden. Remove and cool completely before adding glaze.

For glaze: combine powdered sugar and lemon juice (a tbsp at a time) until you have a thick almost-paste that falls slowly from the fork (you can test this within your mixing bowl.) Drizzle over cooled cookies.

Sunday, February 10, 2008

Cardamom-Chocolate Pinwheels

I've found a new favorite food blog! Dear god, this site is awesome: besides decadent recipes, she includes wonderful photos and notes. I didn't make any changes to the recipe this time around, so the original is here. I was impressed with the chocolate-pepper combination as pepper in general is not something I add to my bakery goods. It did indeed blend beautifully with these flavors though: a rich, chewy shortbread followed by the tiniest of kicks.

The prospect of swirling two flavors together in a cookie has left me breathless with possibilities: raspberry and lemon! Chocolate and orange! White chocolate and strawberry! Now that I have a base I believe I'll begin experimenting. Prepare for the pinwheel stampede!

Sunday, July 01, 2007

Praline Cheesecake

I've been derelict in my posting, but lo, I bring great gifts for forgiveness. I've been wanting to make a praline cheesecake for months, but could not find the recipe I wanted. Today I was looking at recipes for pecan floretines and suddenly I couldn't resist the craving for a praline cheesecake any more. Since I had already started the floretines though, I decided to merge and marvel. This is my pecan praline cheesecake with floretine topping. All together now: "mmmmmmmm!"

Floretines: (from Mrs. Fields' I Love Chocolate! Cookbook)
* 4 tbsps unsalted butter
* 1/3 c packed light brown sugar
* 1/4 c light corn syrup
* 1/2 c finely chopped pecans
* 1/3 c all-purpose flour
* 1 1/2 tsp vanilla extract
* 1 tsp salt

Preheat the oven to 350 degrees. Butter and flour a cookie sheet.

In a small saucepan, melt the butter over medium heat. Add the brown sugar and corn syrup, then bring to a boil over medium heat, stirring constantly until the sugar dissolves, 3-5 minutes. Remove from the heat.

Stir in the pecans, flour, and vanilla. Drop the batter into 1/2-tsp mounds 2 inches apart on the prepared cookie sheet. Using a small spatula, spread each mound into a circle.

Bake for 8-10 minutes, or until browned, rotating the pan back to front after 4 minutes. Cool on the cookie sheet for about 1 minute, then transfer to wire racks to cool completely.

Cheesecake:
* 1 c packed dark brown sugar
* 1/2 c whipping cream
* 1/3 c butter, softened
* 2 tbsp praline liqueur
* 3 c pecans
* 1 c granulated sugar
* 3 tbsp melted butter
* 24 oz cream cheese, softened
* 3 eggs, room temperature
* 1/4 c praline liqueur

In a small saucepan, combine the brown sugar, whipping cream, and butter. Bring to a boil over medium-high heat; boil for 3 minutes. Remove 1/3 c of the sauce; refrigerate until chilled. To remaining sauce add 2 tbsp liqueur; set aside.

Combine pecan pieces and 1/4 c of the sugar in food processor; pulse until it resembles coarse crumbs (do not overprocess.) Transfer to medium bowl and stir in melted butter.

Press nut mixture into bottom and halfway up sides of a 9-inch springform pan. Wrap outside of pan with 2 sheets of aluminum foil; bake in 325 degree F oven for 15 minutes.

Beat cream cheese with remaining 3/4 c of sugar. Add eggs, one at a time, beating just until blended. Stir in 1/4 c liqueur. Pour cream cheese mixture into nut crust. Drizzle the 1/3 c chilled sauce on top; gently swirl with knife.

Place foil-wrapped cake in a 1 inch water bath; return to 325 degree F oven for 1 hour. Turn oven off, leaving cheesecake in oven without opening the door for another hour (prevents cake from cracking.) Cool on wire rack.

Break floretines into pieces (1-2 inches); line top of cake with pieces. Drizzle melted chocolate over the top, then frigerate cake for 4 hours or overnight. Serve with warmed remainder sauce.


Monday, April 30, 2007

Hazelnut Fingerprints

In making the macarons from my prevous post, I ended up with 2X+ the ganache I actually needed. Not wanting to have a container of strawberry chocolate sitting around to tempt me, I went searching for a quick way to use it. I found something that halfway suited; I forgot how hard it is to shell hazelnuts. These turned out to be well worth it. They're like soft shortbread: dry, with a gentle crunch from the nuts, made moist by the chocolate topping. Yum.

Ingredients:
* 2/3 cup Sugar
* 1 cup softened Butter
* 2 tsp Vanilla Essence
* 1 tsp grated Lemon Peel
* 1 Egg Yolk
* 2 1/4 cup Fine Wheat Flour (Maida)
* 1 1/2 cup ground Hazelnuts
* 1/2 cup Jam (I used chocolate spread instead)

How to make hazelnut cookie recipe:
Preheat the oven at 325 degrees. In a bowl mix sugar and butter, beating the mixture till soft and fluffy. Add vanilla essence, lemon peel and egg yolk, mix well.

Add the flour and the hazelnuts. Make 1 1/4 size balls out of the dough. Take a ungreased cookies sheet and place the balls on it 2 inches apart. Press the cookies in the center with the thumb.

Bake the cookies at 325 degrees for 10 to 15 minutes or until light golden brown around edges. When completely cool fill the cavity of each cookie with ½ teaspoon jam.

Chocolate-Strawberry Macarons

After reading through Zinnur of Our Patisserie's adventures with macarons, I decided it was time to try them myself. Luckily for me, I had the benefit of her experiences to draw from, as well as those from David Lebovitz's blog (he's in France, where they have ingenious recipes like Salted Caramel Ice Cream. -droooooools-) I decided to use David's recipe, with a few minor changes. The end result was gorgeous: crunchy, chewy, sweet and fruity all at once. My ganache for the center was a little too soft: I didn't drain the strawberry juice before adding the puree because I wanted to keep the full flavor. In retrospect this was a mistake; next time I would add the juice to the cream and boil it a little.

Macaron Batter
* 1 cup (100 gr) powdered sugar
* ½ cup powdered almonds (about 2 ounces , 50 gr, sliced almonds, pulverized)
* 3 tablespoons (25 gr) unsweetened Dutch-process cocoa powder
* 2 large egg whites, at room temperature* 5 tablespoons (65 gr) granulated sugar

Chocolate Filling
* ½ cup (125 ml) heavy cream* 2 teaspoons light corn syrup
* 4 ounces (120 gr) bittersweet or semisweet chocolate, finely chopped
* 1 tablespoon (15 gr) butter, cut into small pieces

Strawberry Filling
* 15 medium strawberries (pitted), about 5 ounces (150 gr) strawberries
* 2½ ounces (70 gr) best-quality milk chocolate, finely chopped
* 2 tablespoons Amaretto

Preheat oven to 375 degrees F (180 degrees C). Line two baking sheets with parchment paper and have a pastry bag with a plain tip (about 1/2-inch, 2 cm) ready.

Grind together the powdered sugar with the almond powder and cocoa so there are no lumps; use a blender or food processor since almond meal that you buy isn't quite fine enough. In the bowl of a standing electric mixer, beat the egg whites until they begin to rise and hold their shape. While whipping, beat in the granulated sugar until very stiff and firm, about 2 minutes.

Carefully fold the dry ingredients, in two batches, into the beaten egg whites with a flexible rubber spatula. When the mixture is just smooth and there are no streaks of egg white, stop folding and scrape the batter into the pastry bag (standing the bag in a tall glass helps if you're alone).

Pipe the batter on the parchment-lined baking sheets in 1-inch (3 cm) circles (about 1 tablespoon each of batter), evenly spaced one-inch (3 cm) apart. Rap the baking sheet a few times firmly on the countertop to flatten the macarons, then bake them for 10-15 minutes. Let cool completely then remove from baking sheet.

Strawberry Filling:
Smash the strawberries with a fork until you have a rough puree. Using a sieve and a wooden spoon, push the strawberry juice into a small saucepan. Keep the pulp. Melt the milk chocolate and the Armagnac in a double boiler or microwave, stirring until smooth. Stir into the strawberry puree. Cool completely to room temperature (it will thicken when cool.)

To make the chocolate filling:
Heat the cream in the small saucepan with the corn syrup and strawberry juice. When the cream just begins to boil at the edges, turn down the heat so it simmers for 2-5 minutes. Remove from heat and add the chopped chocolate. Let sit one minute, then stir until smooth. Stir in the pieces of butter. Let cool completely before using.

Assembly:
Spread a bit of batter on the inside of the macarons then sandwich them together. (You can pipe the filling it, but I prefer to spread it by hand; it's more fun, I think.)I also tend to overfill them so you may or may not use all the filling.

Let them stand at least one day before serving, to meld the flavors. Store in an airtight container for up to 5 days, or freeze. If you freeze them, defrost them in the unopened container, to avoid condensation which will make the macarons

Peanut Butter Raisin Cookies

I found these last minute, and it turned out to have the best (and funkiest) texture I've ever found. Although the dough was soft, these cookies crumbled with you touched them and melted in your mouth. The boyo tried one under duress but was soon begging for "just one more!" Recipe compliments of Diana's Desserts.

Ingredients:
* 1/2 cup raisins
* 7 tbsp. (3/4 stick/3 1/2 oz/100g) butter, softened
* 1/4 cup crunchy peanut butter (I used smooth)
* 1/2 cup granulated sugar
* 1 cup all-purpose flour
* 1/2 teaspoon baking soda

Instructions:
1. Preheat oven to 350 degrees F (180 C). Cream butter, peanut butter and sugar together until light and fluffy. 2. Sift together the flour and baking soda.
2. Mix in sifted dry ingredients to butter mixture to form a dough. Add raisins and mix well.
3. Roll tablespoons of mixture into balls and place on cookie sheet; flatten balls with fingers.
4. Bake for 15-20 minutes in preheated 350 degree F (180 C) oven.
5. Leave cookies to cool on cookie sheet. Makes 16 cookies.

Monday, December 18, 2006

Raspberry Strippers

I didn't pick the name! These are ok, more of a breakfast pastry than a dessert. They look pretty though!

Ingredients:
* 1/3 cup granulated sugar
* 5 tablespoons butter or stick margarine, softened
* 1 1/2 teaspoons vanilla extract
* 1 large egg white
* 1 cup all-purpose flour
* 2 tablespoons cornstarch
* 1/4 teaspoon baking powder
* 1/4 teaspoon salt
* Cooking spray
* 1/3 cup raspberry or apricot preserves
* 1/2 cup powdered sugar
* 2 teaspoons fresh lemon juice
* 1/4 teaspoon almond or vanilla extract

Directions:
1. Preheat oven to 375°.
2. Beat granulated sugar and butter with a mixer at medium speed until well-blended (about 5 minutes). Add 1 1/2 teaspoons vanilla and egg white; beat well. Lightly spoon flour into a dry measuring cup; level with a knife. Combine flour, cornstarch, baking powder, and salt, stirring well with a whisk. Add flour mixture to sugar mixture, stirring until well-blended. (Dough will be stiff.)
3. Turn dough out onto a lightly floured surface. Divide dough in half. Roll each portion into a 12-inch log. Place logs 3 inches apart on a baking sheet coated with cooking spray. Form a 1/2-inch-deep indentation down the length of each log using an index finger or end of a wooden spoon. Spoon preserves into the center. Bake at 375° for 20 minutes or until lightly browned. Remove logs to a cutting board.
4. Combine powdered sugar, lemon juice, and almond extract; stir well with a whisk. Drizzle sugar mixture over warm logs. Immediately cut each log diagonally into 12 slices. (Do not separate slices.) Cool 10 minutes; separate slices. Transfer slices to wire racks. Cool completely.
5. Yield: 2 dozen

Eggnog Cookies with Rum Butter Icing

Best. Cookies. Ever. Oh WOW it surprised me. I was just looking for a recipe to use up the rest of my eggnog. Now I have to go buy some more to fill my new craving. Wow. Wowwowwow.

Ingredients:
* 1 cup firmly packed dark brown sugar
* 1/2 cup unsalted butter, softened
* 1 large egg
* 2/3 cup prepared eggnog
* 2 cups all-purpose flour
* 1/2 teaspoon baking soda
* 1/2 teaspoon salt
* 1/2 teaspoon ground nutmeg
* 1/2 teaspoon ground ginger
* 1/4 cup unsalted butter
* 3 tablespoons rum
* 1 1/2 cups powdered sugar
* 1/4 teaspoon ground nutmeg

1. Preheat oven to 350°F.
2. In a large mixing bowl, cream brown sugar and first addition of butter until smooth and light. Beat in egg until well blended. Stir in eggnog.
3. Mix together flour, baking soda, salt, first addition of nutmeg and ginger in a medium bowl. Blend into creamed mixture until smooth. Using either a ¼-cup measure or a 2-ounce ice cream scoop, scoop level measures of dough onto ungreased cookie sheets, spaced 2½ inches apart.
4. Bake until cookies are golden and firm to the touch, about 15 minutes. Using a spatula, transfer cookies to a wire rack and let cool. When cookies are completely cool, decorate with icing.
5. To make the icing, melt remaining butter and combine with rum in a small mixing bowl. Stir in powdered sugar, 1/2 cup at a time, blending until smooth. Let sit for 15 minutes to thicken slightly. Spread icing on top of cooled cookies and garnish with remaining nutmeg.

Sunday, December 10, 2006

Gingerbread Men

This and hot cocoa: a Christmas staple. I'm not normally a fan of ginger cookies, but something about gingerbread men makes all the difference. I'm afraid I was (am!) the morbid little girl who would eat first one leg, then another, working my way up until only the head was left. Stars and trees (not shown) I'd just eat haphazardly.

I liked this recipe (from joyofbaking.com) much more than normal because the cookies came out soft, not hard as cardboard like standard ginger cookies. The eyes are chopped crystalized ginger; otherwise I just used frosting for decoration. My frenzed (12 hour) baking day is over, yet not: I finished the goodies (these + hot cross buns) for tomorrow, but I still have truffles and Christmas candy to finish for the gift packages. Good thing I like cooking!

Ingredients:
* 3 cups (420 grams) all purpose flour
* 1/4 teaspoons salt
* 3/4 teaspoon baking soda
* 2 teaspoons ground ginger
* 1 teaspoon ground cinnamon
* 1/4 teaspoon ground nutmeg
* 1/4 teaspoon ground cloves
* 1/2 cup (113 grams) unsalted butter, room temperature
* 1/2 cup (100 grams) granulated white sugar
* 1 large egg
* 2/3 cup (160 ml) unsulphured molasses

Confectioners Frosting:
* 2 cups (230 grams) confectioners sugar (icing or powdered sugar), sifted
* 1/2 cup (113 grams) unsalted butter, room temperature
* 1 teaspoon pure vanilla extract
* 1 1/2 tablespoons milk or light cream
* Assorted food colors (if desired)

Gingerbread Men: In a large bowl, sift or whisk together the flour, salt, baking soda, and spices. Set aside.

In the bowl of your electric mixer (or with a hand mixer), with the paddle attachment, cream the butter and sugar until light and fluffy. Add the egg and molasses and beat until well combined. Gradually add the flour mixture beating until incorporated.

Divide the dough in half, and wrap each half in plastic wrap and refrigerate for at least two hours or overnight.

Preheat oven to 350 degrees F (177 degrees C) and place rack in center of oven. Line 2 baking sheets with parchment paper and set aside while you roll out the dough.

On a lightly floured surface, roll out the dough to a thickness of about 1/4 inch. Use a gingerbread cutter to cut out the cookies. With an offset spatula lift the cut out cookies onto the baking sheet, placing the cookies about 1 inch (2.54 cm) apart. If you are hanging the cookies or using as gift tags, make a hole at the top of the cookies with a straw or end of a wooden skewer.

Bake for about 8 - 12 minutes depending on the size of the cookies. Small ones will take about 8 minutes, larger cookies will take about 12 minutes. They are done when they are firm and the edges are just beginning to brown.

Remove the cookies from the oven and cool on the baking sheet for about 1 minutes. When they are firm enough to move, transfer to a wire rack to cool completely.

If desired, you can press raisins, currants, or candies into the dough for eyes and buttons while the cookies are still warm. Otherwise, confectioners frosting can be used to decorate the cookies. You can also use the icing as a glue to attach candies, raisins, and sprinkles.

Confectioners Frosting: In an electric mixer (or with a hand mixer), cream the butter until smooth and well blended. Add the vanilla extract. With the mixer on low speed, gradually beat in the sugar. Scrape down the sides of the bowl and beater. Add the milk and beat on high speed until frosting is light and fluffy (about 3-4 minutes). Add a little more milk if too dry. Place the frosting in a pastry bag fitted with a decorative tip and decorate the gingerbread men as desired.

Tint portions of frosting with desired food color (I use the paste food coloring that is available at cake decorating stores and party stores).

Makes about 3 dozen cookies depending on the size of cookie cutter used.

Store in an airtight container.

Wednesday, November 22, 2006

Peppermint Bark Cookies

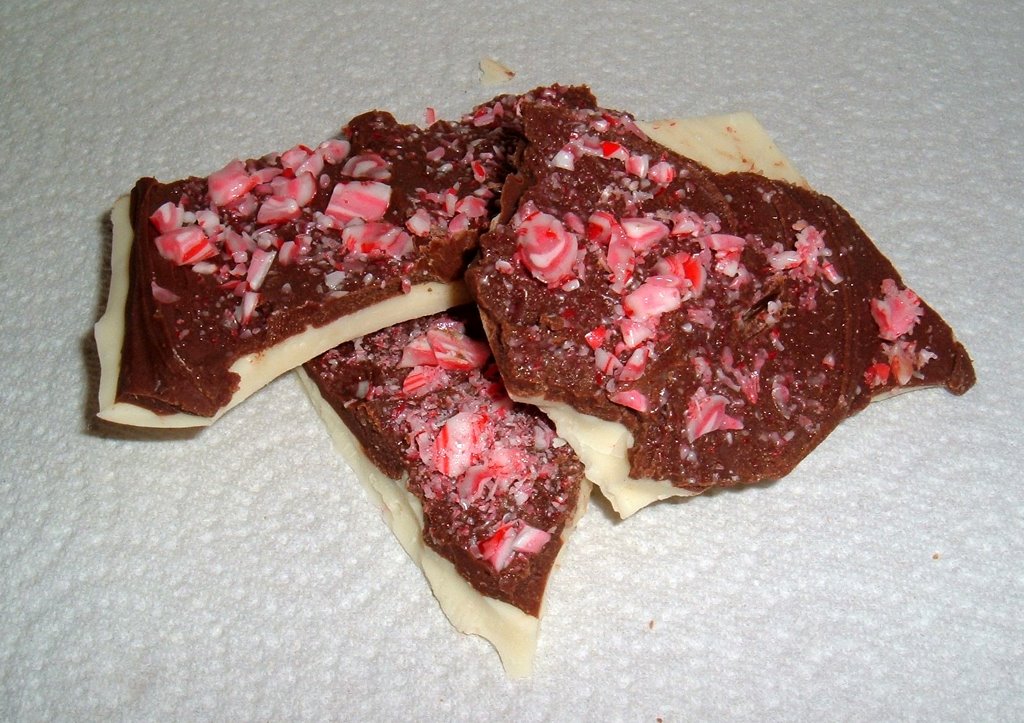
I made these for a friend who's taking care of our kitties while we're away next week. Peppermint bark is a gorgeous concoction generally saved for the holidays (a tradition I aim to change immediately!). It's a layer of milk chocolate, covered in a layer of white chocolate, and sprinkled with crushed candy canes. Genius, the person who invented it!

I had a moment of culinary stupidity while making the bark. After making the bark and fridgerating it, the recipe called for you to "break" it. I promptly fetched a hammer.

-squish-

Bark isn't like brittle -- it smooshes instead of shattering. A butcher's knife proved much better at cutting it down to size, and didn't separate the layers like the hammer did (-ahem-.) But that just left me with "unuseable" bits to nibble on!
Cookies
Ingredients:
* 1/2 cup (1 stick) butter, softened
* 1 cup light brown sugar (not packed!)
* 3 tablespoons granulated sugar
* 1 large egg
* 2 teaspoons vanilla extract
* 1-3/4 cups all purpose flour
* 1/2 teaspoon baking powder
* 1/2 teaspoon baking soda
* 1/2 teaspoon salt
* 1 1/4 cups peppermint bark, chopped (recipe below)

Preheat oven to 300 degrees. Cream the butter with the sugars using an electric mixer on medium speed until fluffy (approximately 30 seconds.) Beat in the egg and the vanilla extract for another 30 seconds. In a mixing bowl, sift together the dry ingredients and beat into the butter mixture at low speed for about 15 seconds. Stir in the peppermint bark.

Using a 1 ounce scoop or a 2 tablespoon measure, drop cookie dough onto a greased cookie sheet about 3 inches apart. Gently press down on the dough with the back of a spoon to spread out into a 2 inch circle. Bake for about 20 (hs note: 25) minutes or until nicely browned around the edges. Bake a little longer for a crispier cookie (hs note: or if your cookies are a bit bigger).

Makes 2 dozen cookies.

Peppermint Bark
Ingredients:
* 9 Candy Canes
* 1 lb. of milk or dark chocolate
* 1 lb. of white chocolate

Directions:
Line a cookie sheet with wax paper. Unwrap candy canes and place in a large resealable bag. With a rolling pin, smash the canes.

Melt milk/dark chocolate in microwave-safe bowl in microwave, on high for 10-15 second cycles. Stir between heatings. Pour chocolate into cookie sheet and carefully spread to ~1/8" thickness. Refrigerate until firm (~15 minutes).

Repeat with white chocolate (careful! White chocolate burns easily, monitor heat closely.) Spread on top of dark chocolate. Before refrigerating, sprinkle the crushed candy canes on the still-warm white chocolate. Refrigerate for ~15 minutes.

Invert bark in cookie sheet and peel off wax paper. Break into a few large chunks with your hands then chop into 1/2" chunks for cookies. Enjoy!

UPDATE: Having now made bark with both milk and dark, I can safely say that dark is much better. It keeps the bark from being overly sweet, and has a more distinguishable flavor from white chocolate than milk.

Friday, October 06, 2006

Vanilla-Orange Drop Cookies

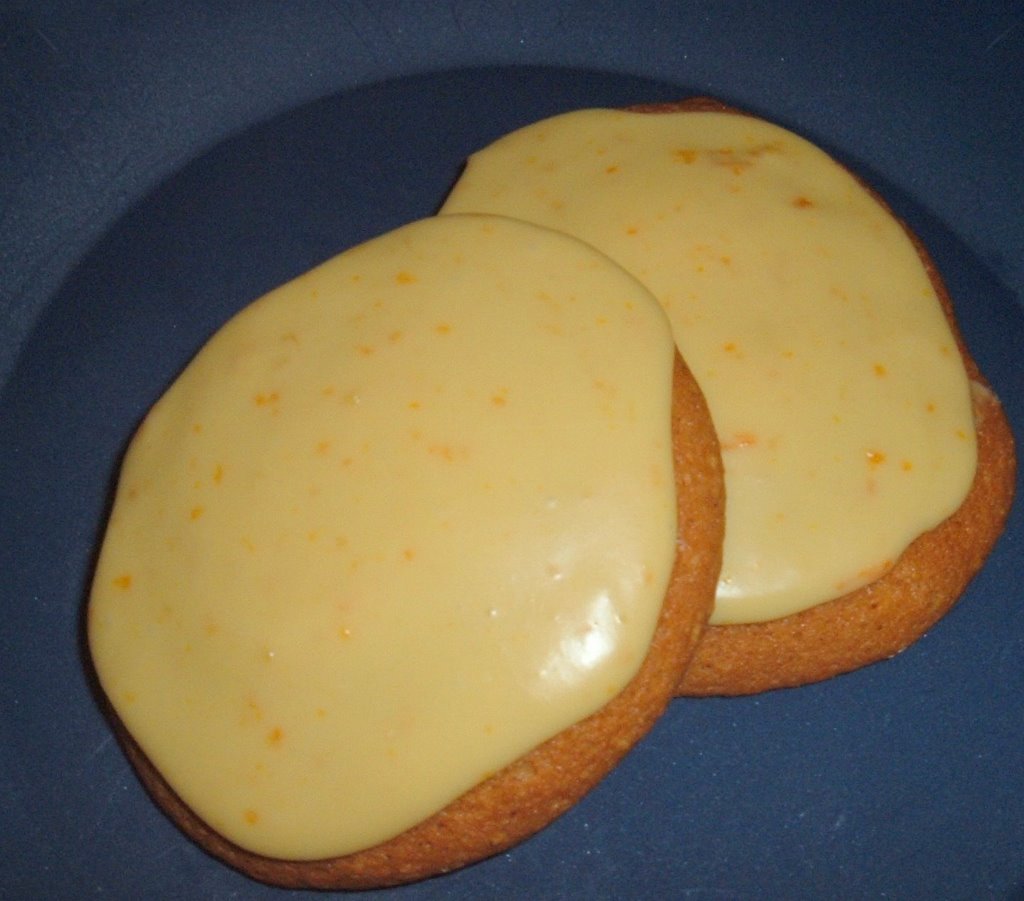
Orange Cookies! Very orange cookies in fact. I experimented with vanilla beans for the first time in this recipe; besides the vanilla extract, I scraped out the seeds of one vanilla bean. Did you know that vanilla beans are not actually bean pods? I was expecting a lima bean-like pod, but in actuality the beans were tiny little bits encased in the pod. Nifty! The other thing to know about vanilla beans is you can pay 8 bucks for a glass container and two vanilla beans. Next time I'm buying them wholesale.
Ingredients:
* 1/2 cup cream cheese, softened
* 1/4 cup (1/2 stick/2 oz/56 gm) unsalted butter, softened
* 1/2 cup brown sugar, firmly packed
* 1/2 cup honey
* 1 large egg
* 1 teaspoon vanilla extract
* 2 cups all-purpose flour
* 3/4 teaspoon baking soda
* 1/2 teaspoon baking powder
* 1 tablespoon grated orange zest
Orange Icing:
* 1/2 can (3 oz.) frozen concentrated orange juice
* 1/2 teaspoon vanilla extract
* 1 teaspoon grated orange zest
* 3 cups confectioners' sugar
Directions:
Preheat oven to 375˚F (190˚C). Grease and flour a cookie sheet or line with parchment paper. In a large bowl, combine cream cheese, butter, sugar, honey, egg and vanilla. Mix at medium speed until smooth. Add dry ingredients and mix until incorporated. Drop medium sized spoonfuls of dough onto cookie sheet and bake for 7-8 minutes. Remove to a wire rack to cool. When cookies are cool, ice with orange icing.
In bowl of an electric mixer or in other medium size bowl, combine all icing ingredients and mix on medium speed with electric stand mixer or electric hand mixer, until smooth.
Makes 3 dozen cookies.

Sunday, October 01, 2006

Lemon-Honey Drops

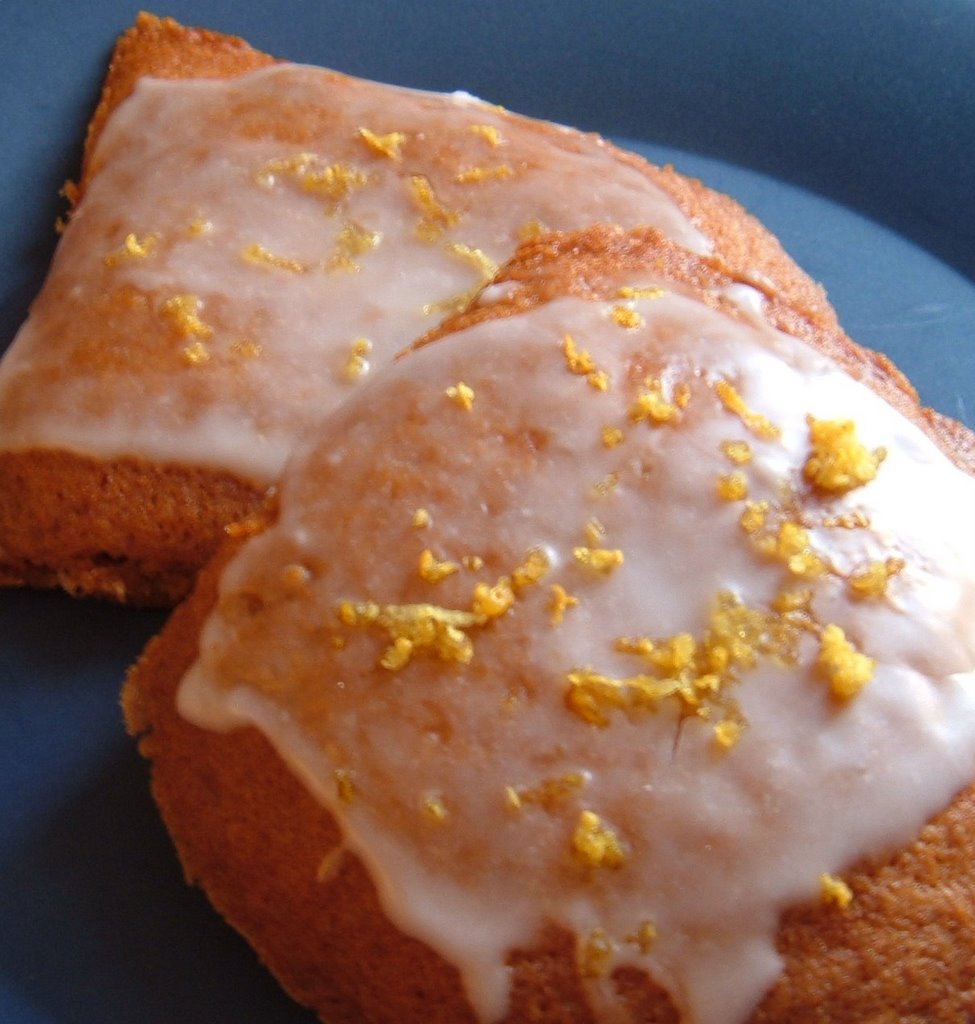
I was making a selection of cookies, and needed to include a non-chocolate item (infidels!) These are Lemon Honey Drops. They've got this gorgeous lemon-sugar frosting that you brush on while the cookies are still warm.
Ingredients:
* 1/2 cup granulated sugar
* 7 tablespoons butter or stick margarine, softened
* 2 teaspoons grated lemon rind
* 1/3 cup honey
* 1/2 teaspoon lemon extract
* 1 large egg
* 1 3/4 cups all-purpose flour
* 1 teaspoon baking powder
* 1/2 teaspoon salt
* 1/4 cup plain fat-free yogurt
* Cooking spray
* 1 cup powdered sugar
* 2 tablespoons fresh lemon juice
* 2 teaspoons grated lemon rind
Instructions:
1. Preheat oven to 350 degrees.
2. Beat first 3 ingredients with a mixer at medium speed until light
and fluffy. Add honey, extract, and egg; beat until well-blended.
Lightly spoon flour into dry measuring cups; level with a knife.
Combine flour, baking powder, and salt, stirring well with a whisk.
Add flour mixture to sugar mixture alternately with yogurt, beginning
and ending with flour mixture. Drop by level tablespoons 2 inches
apart onto baking sheets coated with cooking spray. Bake at 350
degrees for 12 minutes or until lightly browned.
3. Combine powdered sugar and juice in a small bowl; stir with a
whisk. Brush powdered sugar mixture evenly over hot cookies. Sprinkle
evenly with 2 teaspoons rind. Remove cookies from pan; cool on wire
racks. Yield: 32 cookies.

Buttermilk Sugar Cookies

First recipe! These are Buttermilk Sugar Cookies, yum. Mine turned out looking more like scones than cookies, but I was making large cookies.
Ingredients:
* 1/2 cup butter (no substitutes), softened
* 1 cup sugar
* 1 egg
* 1 teaspoon vanilla extract
* 2 1/2 cups all-purpose flour
* 1/2 teaspoon baking soda
* 1/2 teaspoon salt
* 1/2 cup buttermilk
Frosting:
* 3 tablespoons butter (no substitutes), softened
* 3 1/2 cups confectioners' sugar
* 1/4 cup milk
* 1 teaspoon vanilla extract
* 1/2 cup finely chopped walnuts or pecans for topping
Directions:
1. In a mixing bowl, cream butter and sugar until light and fluffy. Beat in egg and vanilla. Combine flour, baking soda and salt; add to the creamed mixture alternately with buttermilk and mix well. Drop by rounded tablespoonfuls 2 inches apart onto greased baking sheets.
2. Bake at 375 degrees for 10 - 12 minutes or until edges are lightly browned. Remove to wire racks to cool.
3. For frosting, combine butter, sugar, milk and vanilla in a mixing bowl; beat until smooth. Frost cookies; sprinkle with nuts if desired.